If you’re reading this, you’re likely an avid rock climber.
You’ve progressed from top roping to leading at your local crag. Now that you’ve learned how to place gear you’ve been hooked on climbing single pitch trad routes. But eventually you’ll start eyeing those bigger walls and snow-capped mountains - that’s why you got into climbing, right?
If this sounds like you, it’s time to try your skills on a multi-pitch route.
The anchors are bolted on most multi-pitch sport climbs. But climbing a traditional multi-pitch route means setting up an anchor in between pitches.
Building a top anchor on a multi-pitch climb requires a good knowledge of gear placement, loading systems, directional forces, and fall factors.
As a trad climber, you’re already one step ahead of the game: you know how to place gear.
Traditional climbing gear includes cams, nuts, hexes, and tricams. It’s important to have a good understanding of how to pick out good placements for each type of protection.
Another important factor to consider is when you’re finishing leading a pitch, especially a long one, the gear you have leftover will be limited. While you’re lead climbing on a multi-pitch route, you’ll need to think ahead to what gear you’ll need for your anchor.
Sometimes, there will be trees or large boulders you can sling. Studying the guidebook can give you some idea of what kind of gear you’ll need to set a top belay, such as if it’s on a ledge, or if you’ll need to build a hanging belay.
We’ll go over the basics of setting a top anchor on a multi-pitch climb in this article.
What You Need to Build a Multi-Pitch Anchor
To build a multi-pitch anchor, you’re going to need a minimum of three pieces of gear, but more is definitely preferable as you may be limited in the sizes of the cracks and crevices at your belay station.
If you’re running low on gear and the appointed belay station is still a long ways above you, it’s okay to build a hanging belay wherever you are on the route. Be considerate of parties behind you and offer to let them pass.
It’s better to build a safe anchor for your second on route than risk running out of enough gear to build an anchor at the designated belay spot.
In addition to gear, you’re going to need a long nylon or Dyneema sling or a cordelette. Some climbers carry both so they have options in different situations. It all comes down to personal preference.
Also, you’re going to need a belay device capable of bringing up your second, such as an ATC guide or a Grigri. Learn how to use your ATC in guide mode before you attempt to set up a multi-pitch anchor.
Make sure to have a handful of extra locking carabiners on hand as well.
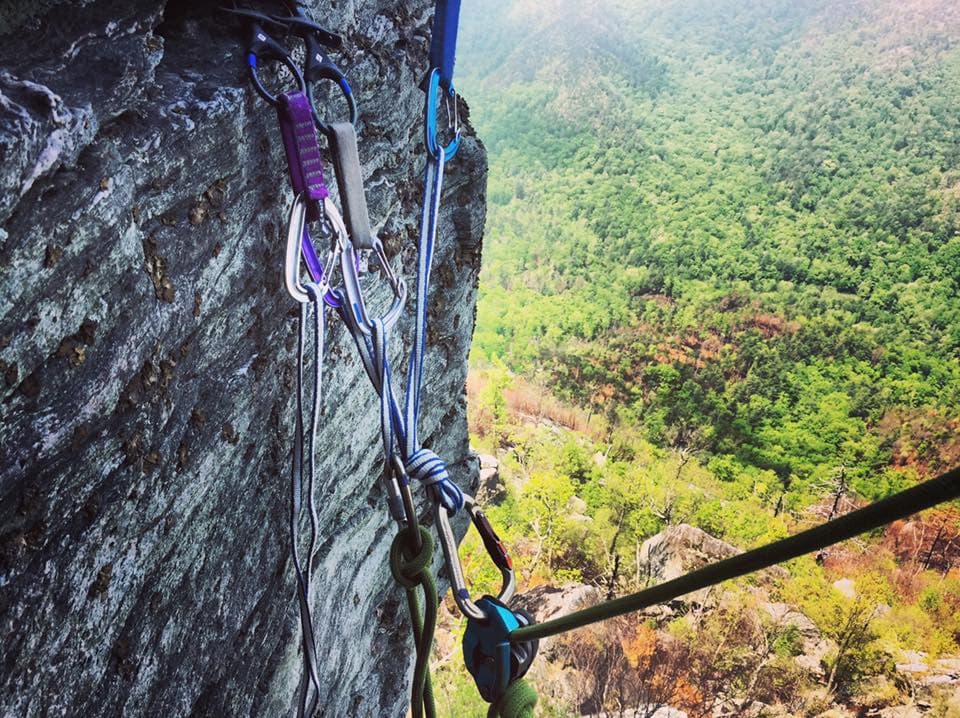
Gear Placement at the Belay
A general rule of thumb is to use three pieces of downward-angled protection when setting up a top anchor, plus one piece of protection to serve for an upward directional.
This piece can be placed after you’ve brought up your second. A combination of active and passive pro or all active pro is ideal. The key here is redundancy.
You’ll want individual pieces to be solid, meaning you’d feel comfortable taking a fall on any of them.
When searching for a good place to build an anchor, keep in mind that you’re going to want to position your three primary pieces near each other.
When you sling the three points of your anchor together with either a long sling or a cordelette, remember that larger angles put more force on each anchor point, so a good rule of thumb is to keep the angles to sixty degrees or less.
You’re going to be belaying your second up to you, meaning your anchor needs to mitigate downward forces in case the climber falls.
Once you’ve placed three pieces of gear, it’s time to equalise them. Equalisation means rigging the anchor so that the load is distributed equally between the individual points.
There are away different ways to accomplish this, but we’ll go over the most common one.
Equalization
Once you’ve placed your anchor pieces, take your sling or cordelette and clip it through each individual carabiner. Pull down on the top sections of the pieces so that you create three loops.
Make them even at the bottom and then analyze where the force on the anchor will most likely come from. Will your climber be coming straight up, from the left, or from the right?
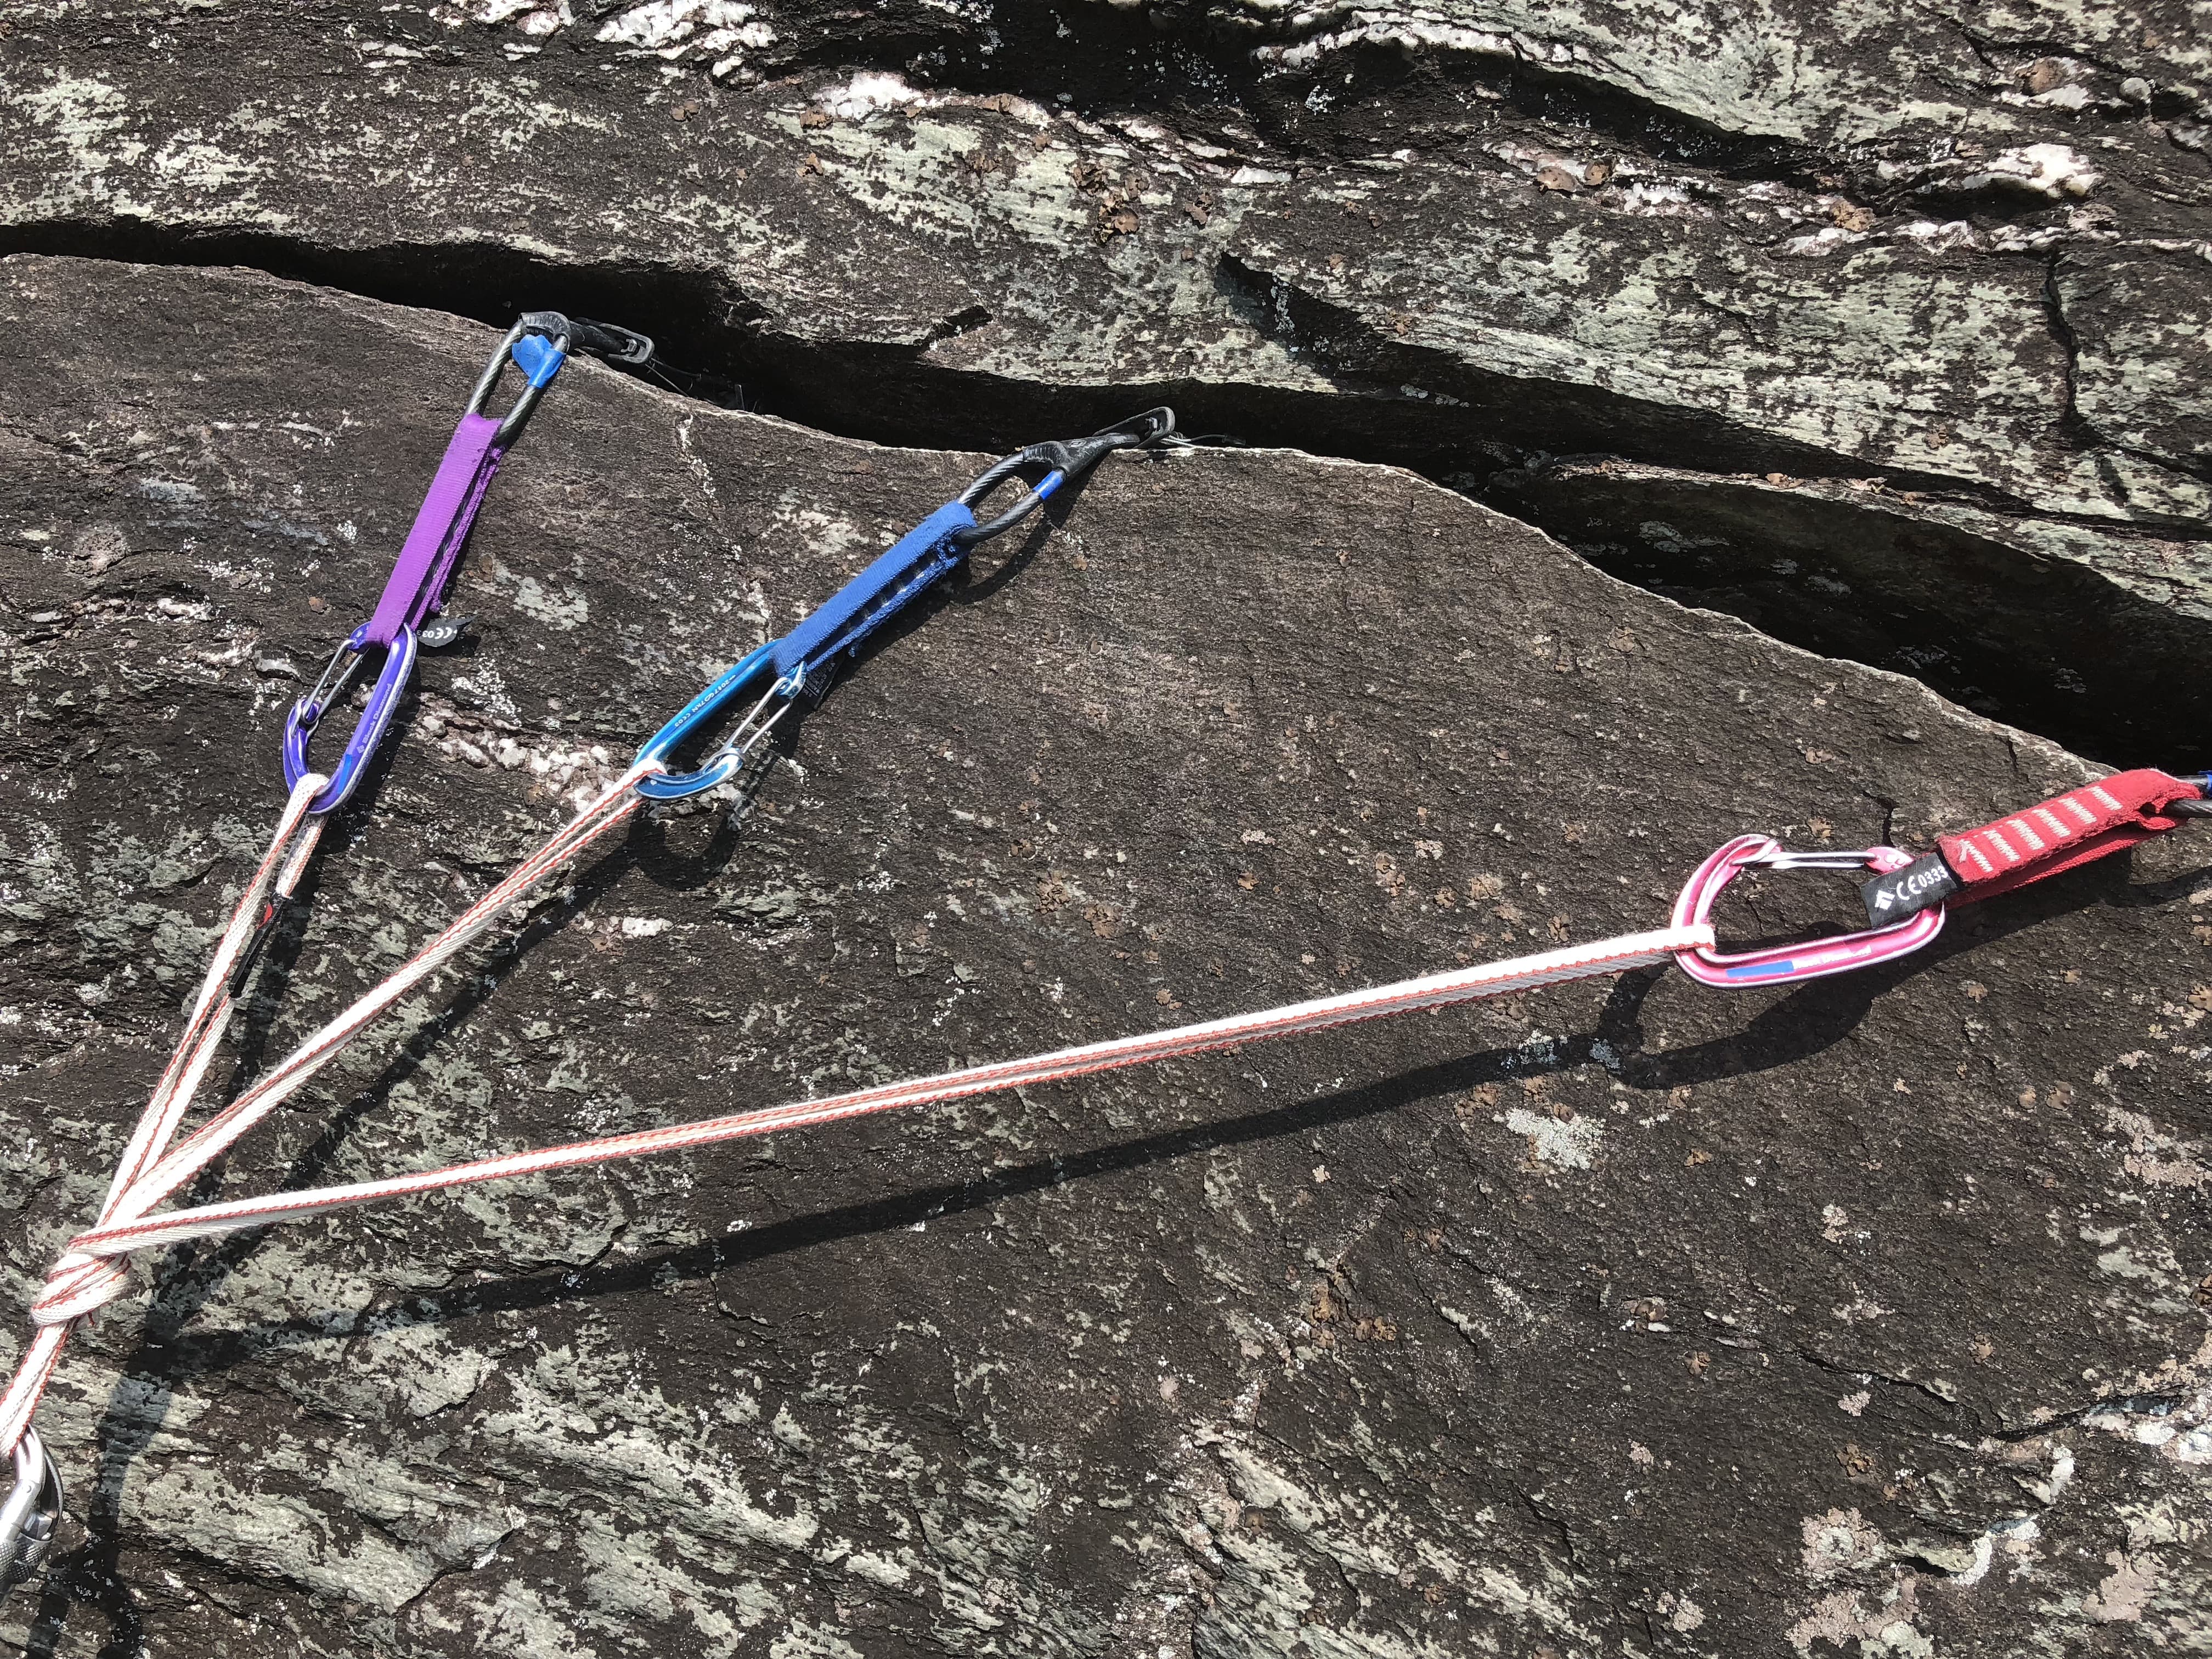
Pull the three loops equally in the direction where you think the forces will come from and tie an overhand knot, creating a ‘master point’ out of three loops leading from the anchor points.
There should be equal forces on each piece. Clip a locking carabiner through your master point and you’ve finished setting up your top anchor.
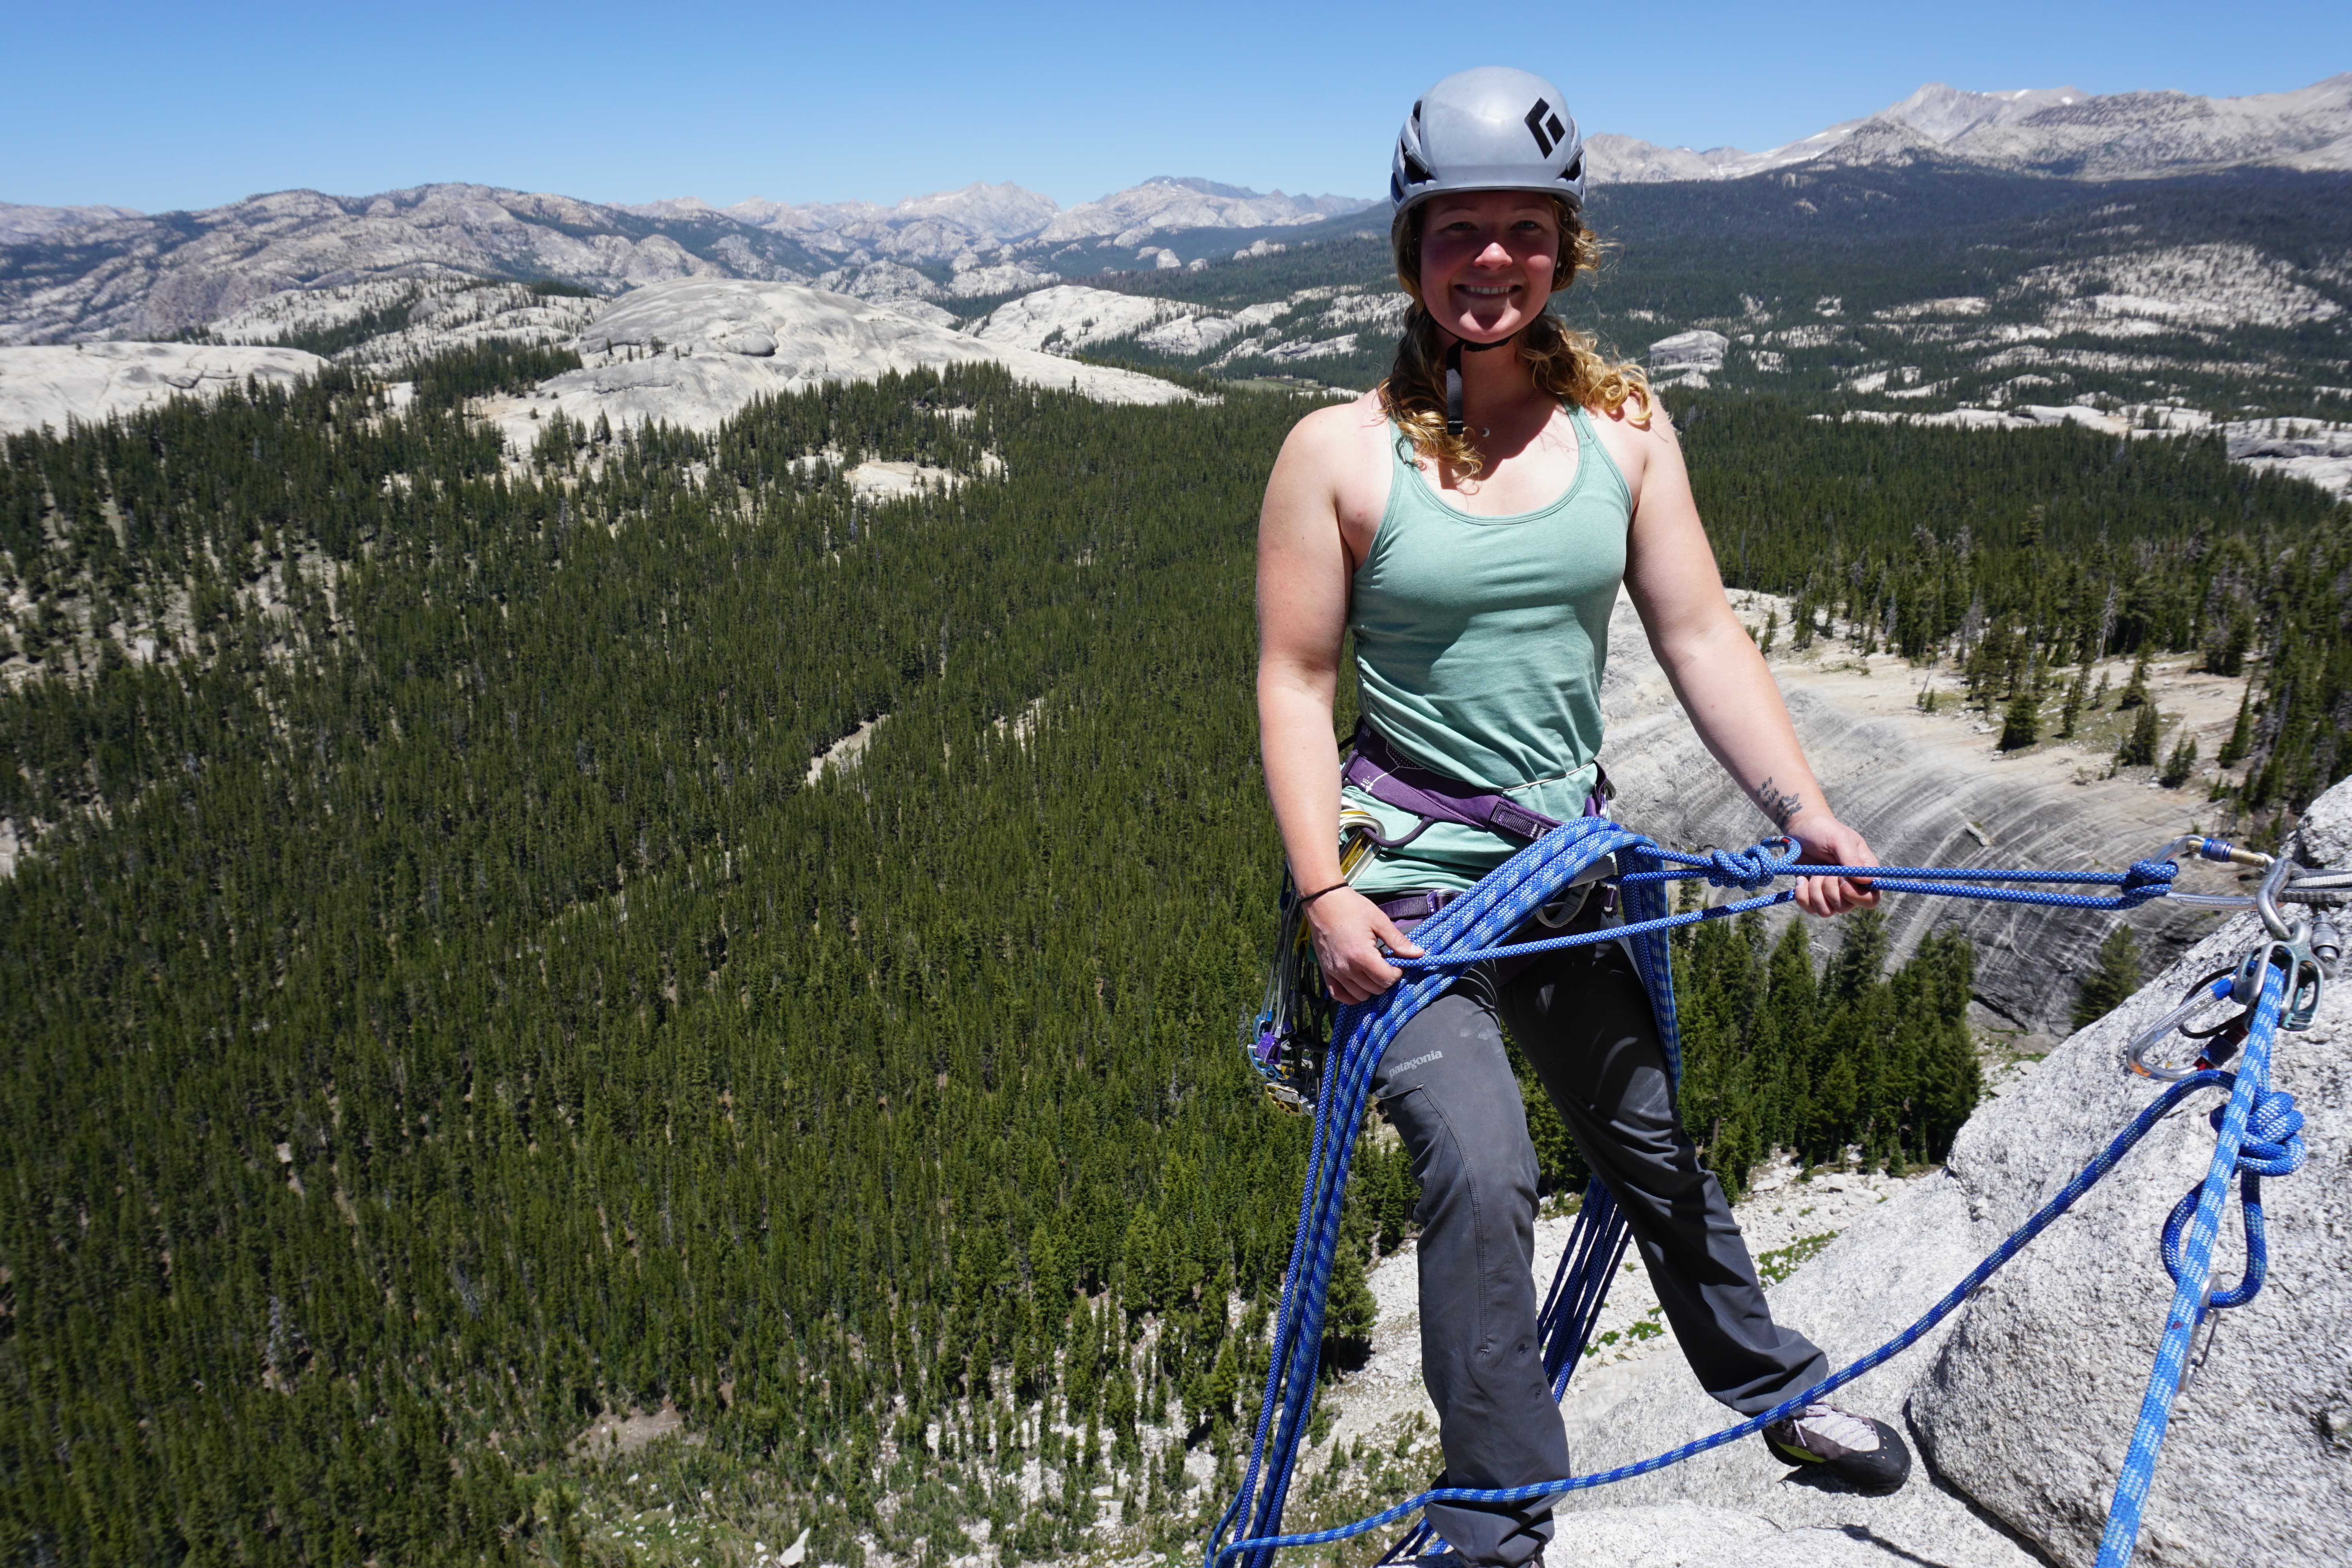
Rope Management
Rope management is one of the most difficult aspects to master while you’re bringing up a second.
You’ll want to be cognisant never to remove your brake hand while at the same time organising the slack you’ll be pulling up for smooth transitions between pitches.
In the very beginning, especially if you’re belaying on a ledge, it’s okay to forgo rope management and flake it out on the ground next to you. Rope management is a crucial part of belaying from a top anchor, so once you’re experienced, you can try this method.
After you’ve built your anchor, position yourself so that the master point is above you. Remember, you’ll be pulling down on the rope leading out of your belay device. A high master point makes this much easier, as you’ll have gravity on your side.
Clove hitch your end of the rope into the locking carabiner on the master point and lean back so that you’re comfortable, weighting the rope between yourself and the master point.
This tightened attachment to the master point creates a way for you to flake out rope while you’re belaying up your climber. You can loosen or tighten your clove hitch until you’re in a comfortable position.

Attach your belay device to the master point above your clove hitch. Then, start pulling up the extra rope until you reach your partner.
Loop large sections on either side of your body, allowing them to hang from your connection to the master point while you rest weighted on the anchor. Try to make your loops long and even. Once you’ve reached your partner, connect their end of the rope into your belay device.
Double check your system and then you can start bringing up your partner.
As you draw up slack, use your free hand to continue looping the excess rope on either side of you. This will take practice but it’s an essential skill that will make multi-pitch climbing much more enjoyable and efficient.
With proper rope management, when your second reaches the belay spot, they will be set up to start leading the next pitch. Proper rope management eliminates flaking the rope any more than you have to.
Understanding Fall Forces
Fall factors while climbing on top rope are not a huge concern, especially if your anchor is solid, directional for the climber, and you quickly pull up slack.
However, when your second reaches you and is ready to climb the next pitch, you’ll be lead belaying them from the same anchor, and now you need to consider the fall factors involved with lead climbing.
It’s a lead climbers responsibility is to place a piece of gear as close to the anchor as possible in order to avoid a factor two fall straight onto the anchor.
If there is no protection for a little while, another option is to clip a sling directly to the highest piece of the anchor and then clip the rope through it. This will direct forces onto a single piece of gear as opposed to the entire master point in case of a fall.
Something else to bear in mind is the direction of the force on the anchor. The anchor you’ve just built may be bomb proof against a downward pull, but with rope drag or a potential fall, it also has to manage an upwards force.
This is where an oppositional piece comes into play. An oppositional piece is a piece of gear pointing upwards below the rest of your anchor. It serves to mitigate any upward force on the anchor ensuring the main pieces of gear stay in place.
Without an oppositional piece, the whole system (including yourself) could be ripped upwards. Make sure your upward directional piece is taut to the anchor to avoid shock loading the system.
Other Considerations
Hanging belays: These should be set up exactly the same as a belay on a ledge. Some climbers actually prefer hanging belays for the simplicity of rope management.
It’s important to be cognisant of space and where your rope loops dangle. You don’t want them to be dangling onto the part of the route where your second will be climbing.
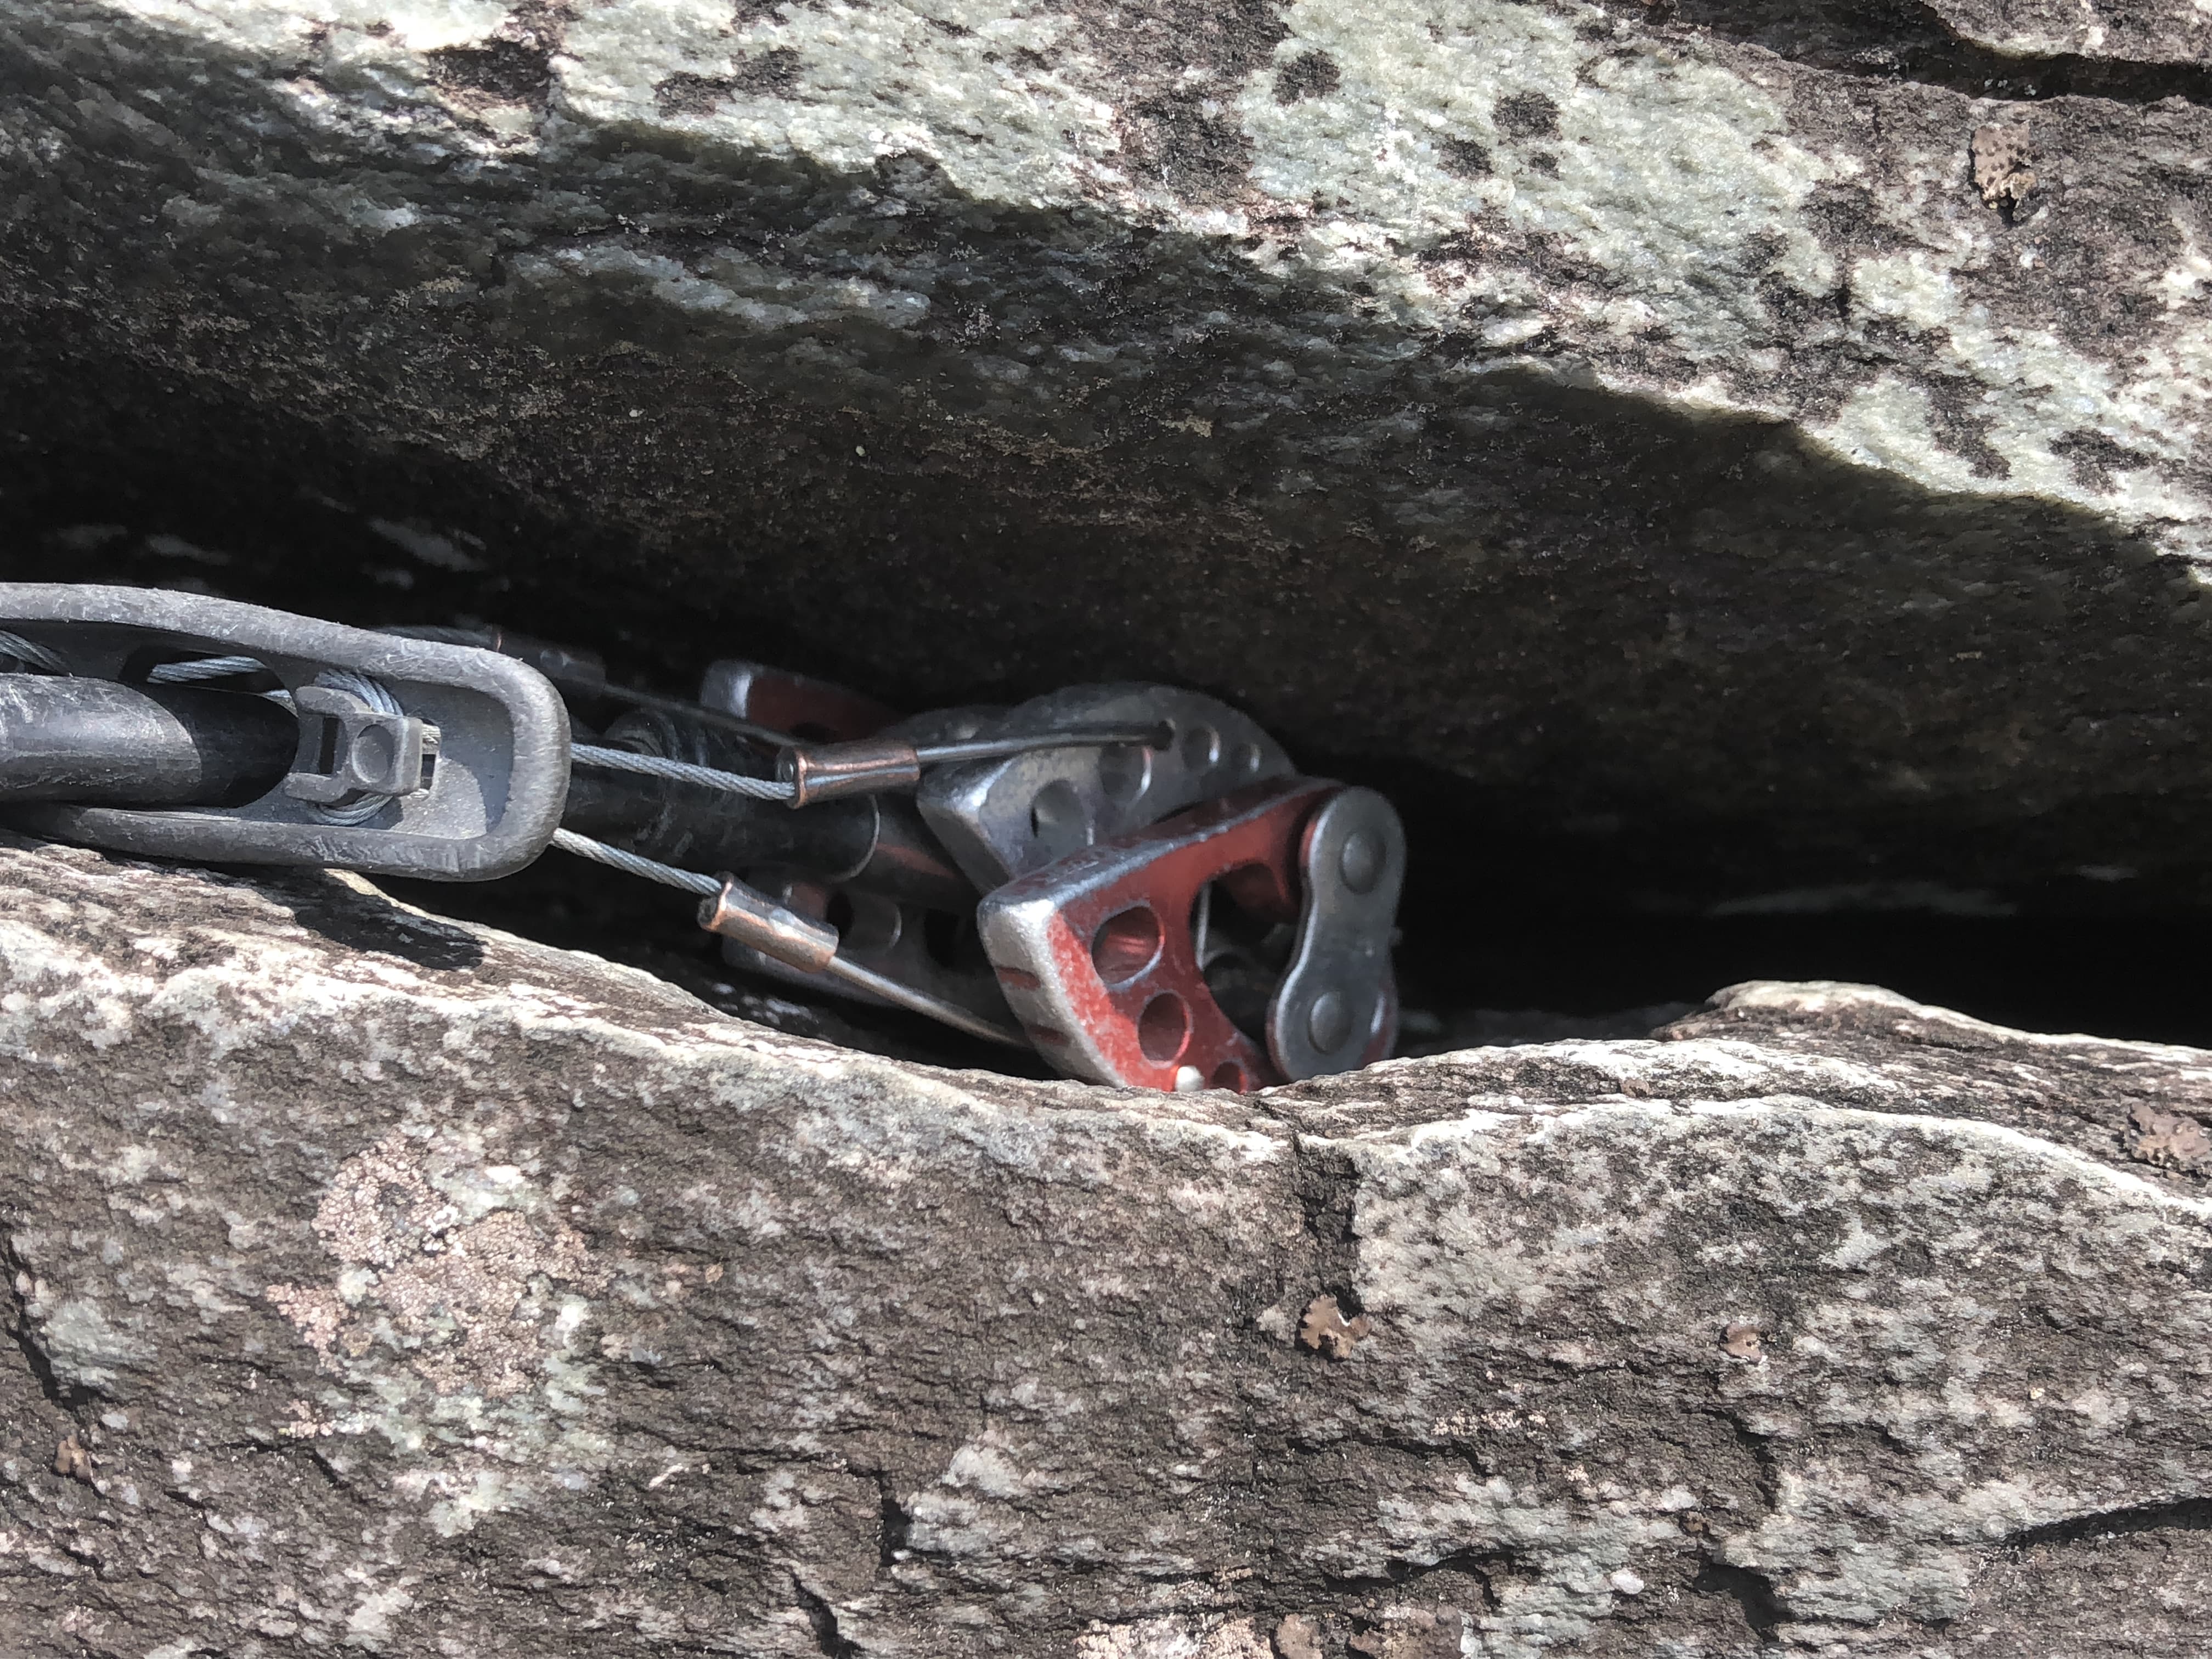
Natural anchors: It is completely acceptable to use a tree or large boulder for an anchor. Before you use a tree, check to make sure it is living, well-rooted, and solid. Use trunks that are at least twelve inches in diameter.
You can also use boulders, rock horns, and chockstones as anchor points. Be sure to check the integrity of the rock. The last thing you want is to build an anchor on brittle or loose rock.
To build an anchor on a natural feature, you use a runner or cordelette around the tree and clip the ends together with a locking carabiner or girth hitch it to create your master point.