Climbing is a sport that can either require minimal equipment or an excessive amount of gear, depending on the climbing discipline you choose. If you’re not an experienced free soloist like Alex Honnold and you decide to climb anything higher than 30 feet, then you probably want to be attached to a rope with a belayer.
The belay device you choose to use will depend on personal preference and the type of climbing you do. Knowing which belay device to use for every occasion and how to operate the device properly is key for safety and success when it comes to climbing ropes. But selecting one of the modern tubular or assisted style belay devices is a great place to start.
There are a wide variety of different belay devices on the market today, making it difficult to know which one is the right for you. That’s why we’ve taken the time to create a comprehensive guide to belay devices, so you can pick one quickly and easily and get on the wall in no time!
Types of Belay Devices / Techniques
Hip / Body Belay

Not one I would recommend today, but the body belay was all the rage before modern belay devices were invented in the early 1970s.
Basically, you just wrap the rope around your waist and use the friction of your own body to catch your climber if they fall.
You may see people using a waist belay in winter conditions or on less steep ground, perhaps when scrambling, but when on class 5 ground, you should be using a belay device.
We live in a day and age now where you can get fairly reasonably priced belay devices in just about any outdoor gear store or online, so there is no need to put yourself or your partner in danger by skipping the device and using your body instead!
Munter Hitch
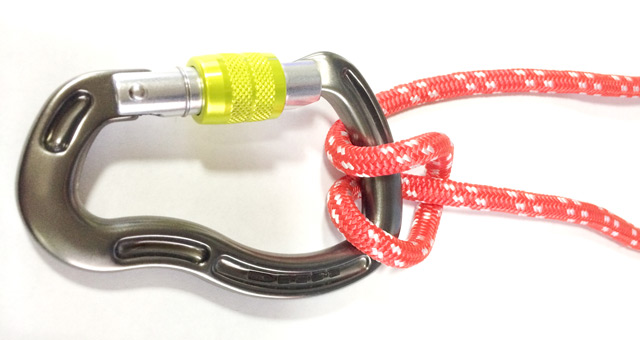
Also not one I would recommend in lieu of a proper belay device, but the Munter Hitch Knot is a great alternative belay technique, in case of an emergency - say you accidentally drop your belay device on pitch 4 of 8 and you have to continue on - the Munter Hitch could come in handy if you know exactly how to tie it and use it.
This knot can also be used to rappel in case of an emergency.
Make sure you practice using this knot a lot on the ground before you ever try to use it on a real belay outdoors, and have an experienced guide check you before putting your newfound knot belay skills to the test.
All you need for the munter hitch is a locking carabiner and your rope.
Figure 8 Belay Device
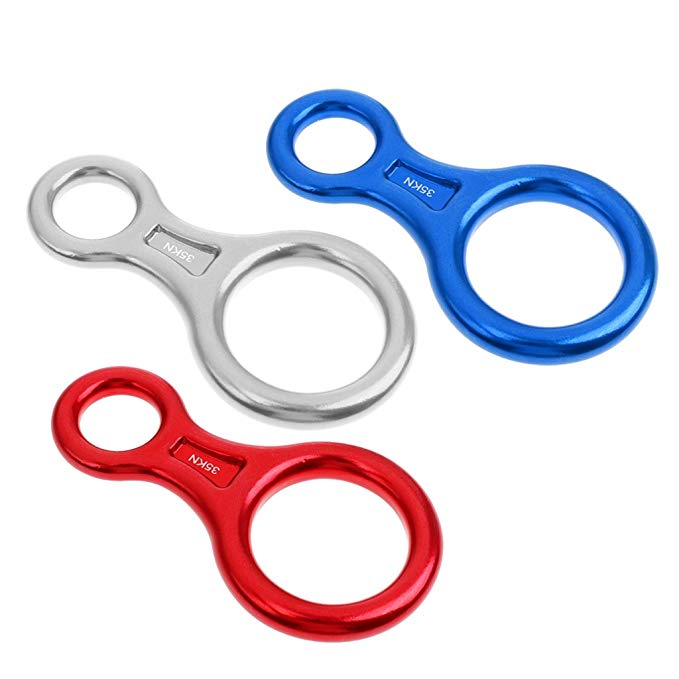
The simplest and lightest belay device on the market - the figure eight.
This device is still popular in Europe, though today it is mostly used for rappelling.
The amount of friction generated while using this device is considerably less than most modern belay devices, so it’s not necessarily as safe compared to other devices.
The mechanism for using the figure eight is relatively simple: feed a bight of rope through the large hole, then loop it outside the small hole. Clip that loop into the belay loop on your harness with a locking carabiner. Then, lock the rope off to your side (brake position), creating enough friction to halt the rope’s movement in case of a fall.
This device is most often used for search and rescue missions or rappelling while splunking.
I would not recommend this device for beginner climbers.
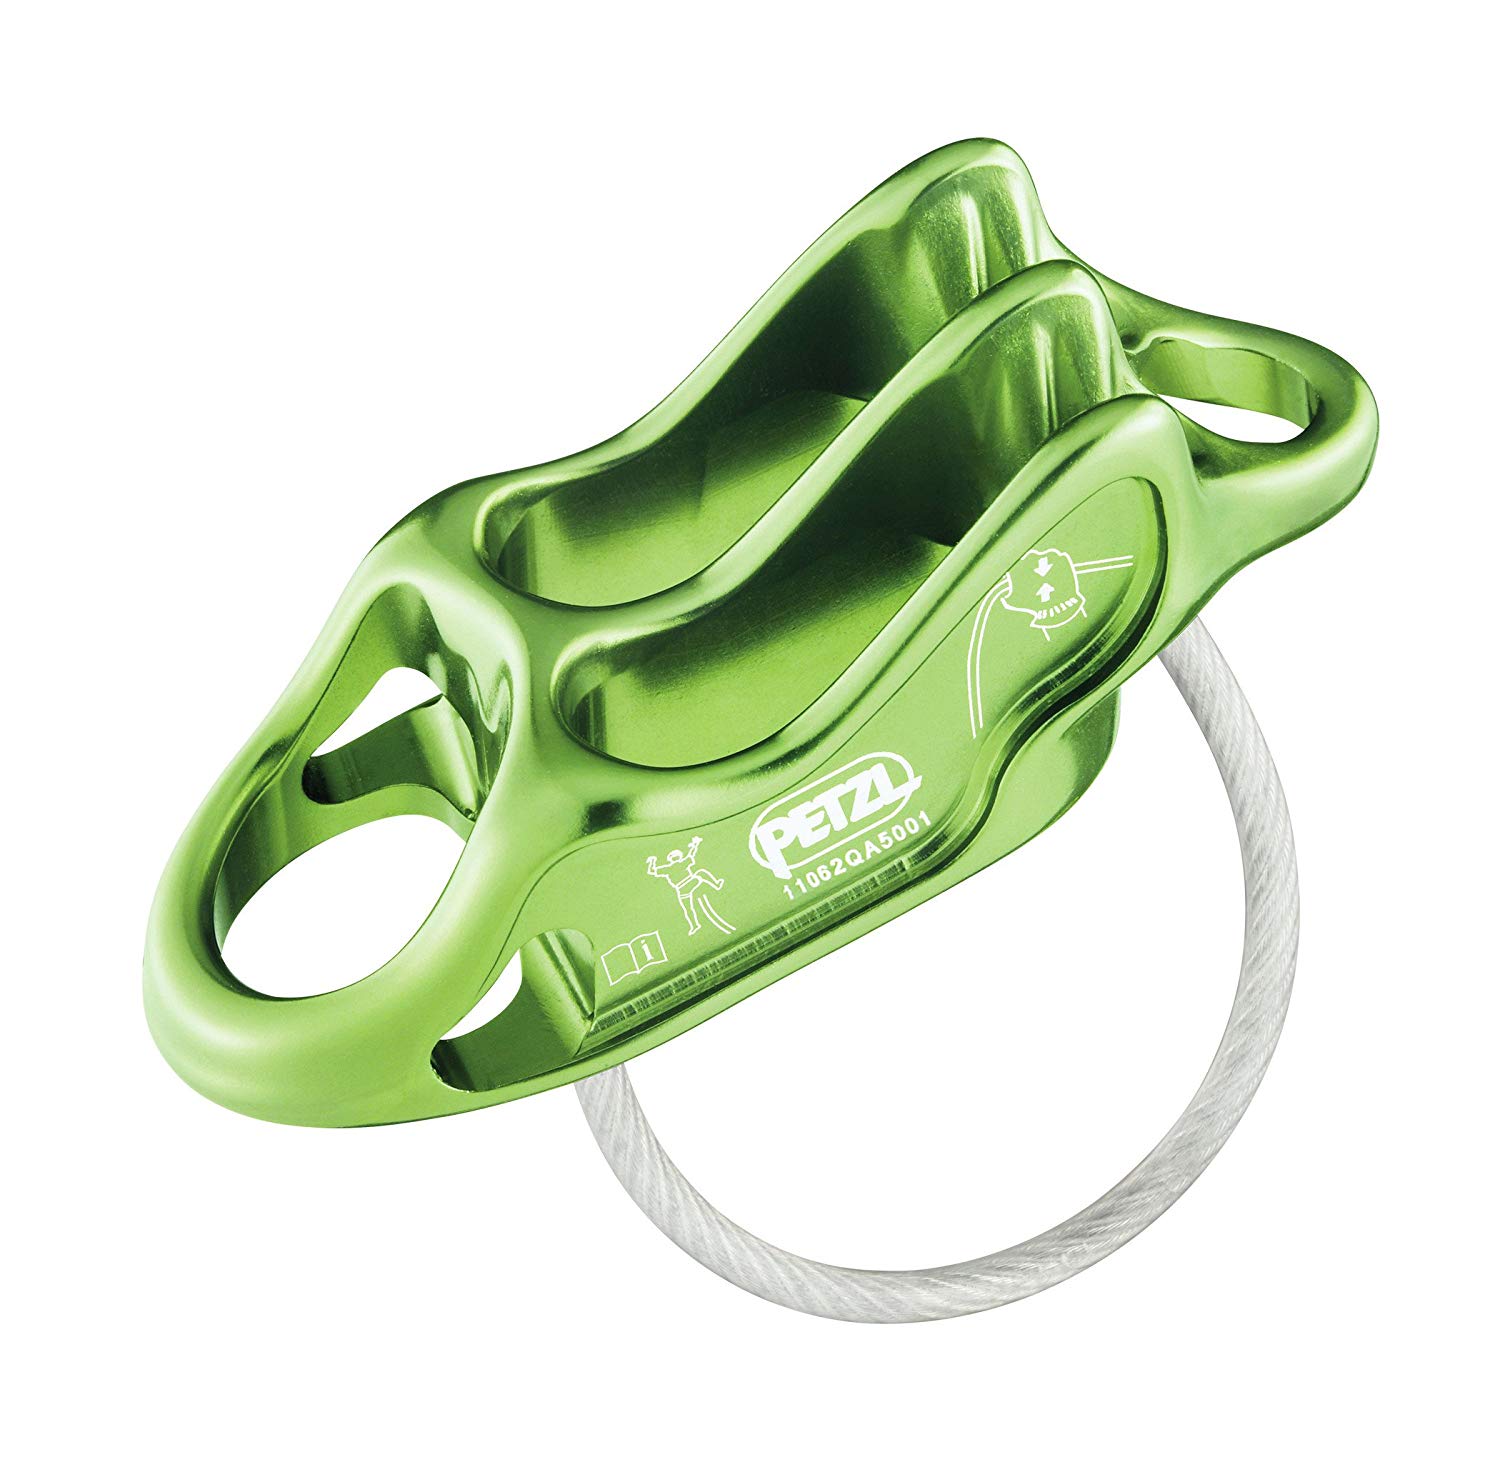
Tubular Belay Devices
This is the most common and popular belay device on the market today, and for good reason.
It is lightweight, durable, and relatively safe compared to earlier designed devices like the figure eight. There are a variety of tubular belay device designs on the market today (i.e. Black Diamond ATC, Petzl Verso, etc), but they require the same belay technique.
You simply insert the bight of your rope through one open slot, then clip a locking carabiner through the loop and attach it to the belay loop on your harness.
Unlike the figure eight, where there is minimal friction except what you produce by holding the rope out to the side, a tubular device creates friction by bending the rope against the metal of the device, which assists in stopping the motion of the rope during a catch.
More advanced tubular devices have grooves on the braking end to help it bite down on the rope, therefore creating more friction to slow a fall.
Tubular devices can be used for any type of climbing - top roping, sport, traditional, alpine, single pitch, multi-pitch, or rappelling.
They are considered the industry standard for belay devices in many countries across the world. The advantages of a tubular device are that they are compact, easy to learn how to use, the ability to use varying diameters of rope, and they are very easy to use for rappelling.
Guide Plate Belay Devices
Guide plates are very similar to the tubular belay device with one minor alteration - there are two attachment points (one large, one small).
The greatest advantage to these advanced tubular devices is that they can be used on multi-pitch climbs to bring up your second on a “direct belay,” where you attach the device itself to your anchor instead of yourself, and therefore can be almost hands-free while belaying from the top.
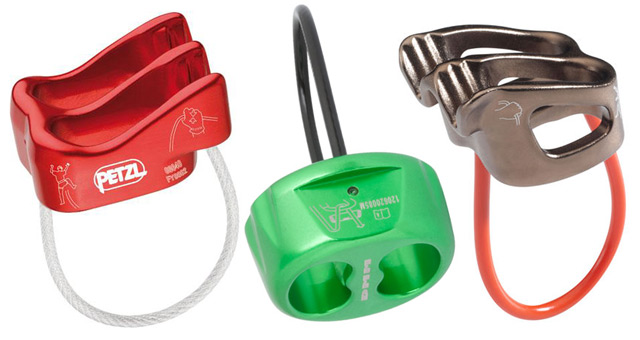
Assisted Braking Belay Devices - Passive

There are two main types of assisted braking devices: active and passive.
The important thing to note here is that no belay device should ever be used hands-free; hence why they’re called assisted braking belay devices.
The reason these devices are considered “passive” is because there are no moving parts that help to assist with braking. Rather, the device stops the motion of the rope by pinching the rope between itself and the carabiner.
These passive belay devices are lightweight, and some of them (like the Edelrid Mega Jul) can also be used in “guide mode,” meaning they can be used for direct belays, similar to the Guide Plates listed above.
Assisted Braking Belay Devices - Active

An active assisted braking device has moving parts that work by pinching the rope between two surfaces inside the device itself.
The Petzl GriGri is by far the most well-known and popular active assisted belay device on the market today.
These devices are great for beginners, as the active braking assistance means a far lower risk of an accidental drop. They can also be used for lead climbing, as the rope feeds out smoothly and easily, making it a breeze to feed your climber enough rope for each clip.
The GriGri is especially nice for projecting big sport routes where your climber is likely to take multiple big whippers while attempting the route - you’ll be grateful for the assisted brake when your climber keeps falling and hanging on the rope throughout their climb!
There are some disadvantages to these types of devices, such as increased weight, high cost, and decreased versatility, but overall the advantage of having the assisted brake far outweighs the minimal drawbacks.
Conclusion
So there you have it - a comprehensive list of all the types of belay device available on the market today! How to choose the right one for you, you ask? Well, first take into consideration where you usually climb and which climbing discipline you are most involved in.
If you’re a gym rat who loves climbing on a top rope or leading long sport routes on plastic holds, then a tubular device or one of the assisted braking devices would probably suit your needs quite well.
However, if you plan on going out on big traditional multi-pitch excursions, then I would highly recommend investing in a guide plate device like the ATC Guide.
If you plan on climbing in Europe anytime soon, then picking up a figure eight could be a cool way to get in with the locals, as long as you’re proficient with its use before heading out to the crag!
You really can’t go wrong with one of the later designs of a belay device, be it a tubular device or an assisted braking device - as mentioned in the introduction, choosing a belay device for you is primarily up to personal preference.
Many climbers choose to have multiple belay devices on hand, depending on the type of climbing they feel like doing that day. It’s good to have a variety, as long as you know how to use each one safely and efficiently to avoid complications.
I would recommend testing out a few at your local gym if you can scrounge up some good-hearted friends to let you borrow their various devices for a couple of catches. See which one feels best for you, and go from there!